Viewing entries tagged
film camera

11 Comments

10 Reasons Why You Should Start Shooting FILM

Leica M3

Here I would like to share my personal views about film photography. Below are the summary :

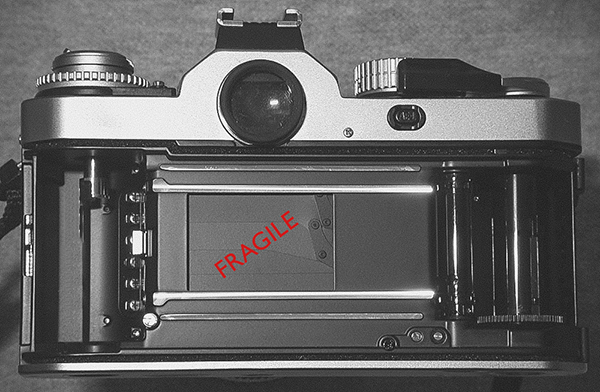
1) Film cameras last a really really long time ! A decent full mechanical camera such as a Nikon FM2 or a Leica M2 / M3 can easily last you a life time without having the need to upgrade. I love buying and collecting full mechanical cameras as they are the most reliable camera ever built. Having no ic chips , circuit board, built in light meter or motor drives, these camera are built to last. Just like your Rolex watches. With a good CLA ( clean, lubricate, and adjustment ) service done by a trained repairman, a 50 year old camera will eventually work like new again and will last you probably another 50 more years.

2) Explore different formats other than full frame.  Shooting anything larger than the 35mm format on digital is might cost you and arm or a leg. A decent medium format with a digital back might set you back around RM40 grand at least. There are tons of other larger formats film camera’s such as 6 X 4.5 , 6 x 6 , 6 X 7 or even 6 X 9 which produces amazing image quality at rather affordable price. Cameras such as the Yashica Mat, Pentacon 6, Mamiya and Kiev88 will probably cost as low as a point and shoot camera. Larger negatives = more details, bokeh and tonal gradation !

3) Skin tone and colors ! Good films such as the Fuji Pro 400H and the Kodak Portra produces amazing skin tones. It’s the most life like color I’ve ever seen from a camera. Every type of films has it’s own unique characteristics. As most photoshop action now days try to mimic film colors and character digitally, why not just use the real deal.

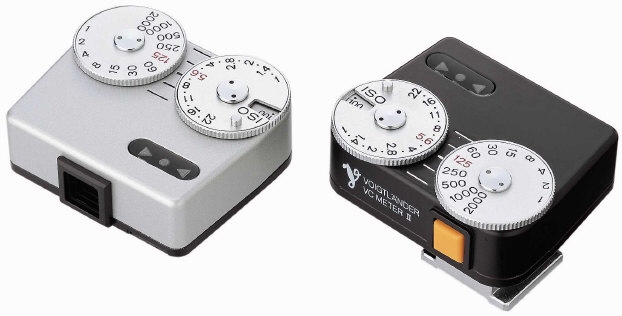
4) Shooting film makes you a better photographer. I have been shooting digitally for the past 6 years and only started film photography 2.5 yrs back. I have never learned so much about photography just until recently. It perfected my exposure and composition, and of course my attitude as a photographer. I have learned to be more patient, visualize my shots before snapping away, understanding DOF / zone focusing and of course the good ol’ Sunny 16 rules, which is to meter without using a light meter ! How cool is that ?

5) A good film camera appreciate in price while digital depreciates horribly . Leica aside, a Contax 645 cost as much as RM 5000 around 4-5 years back are now fetching close to 9k price tag just recently. I can still recall buying my Nikon D300 when it first launched at the price of RM 5.7k, while I sold it 2.5 years later for RM 2k.

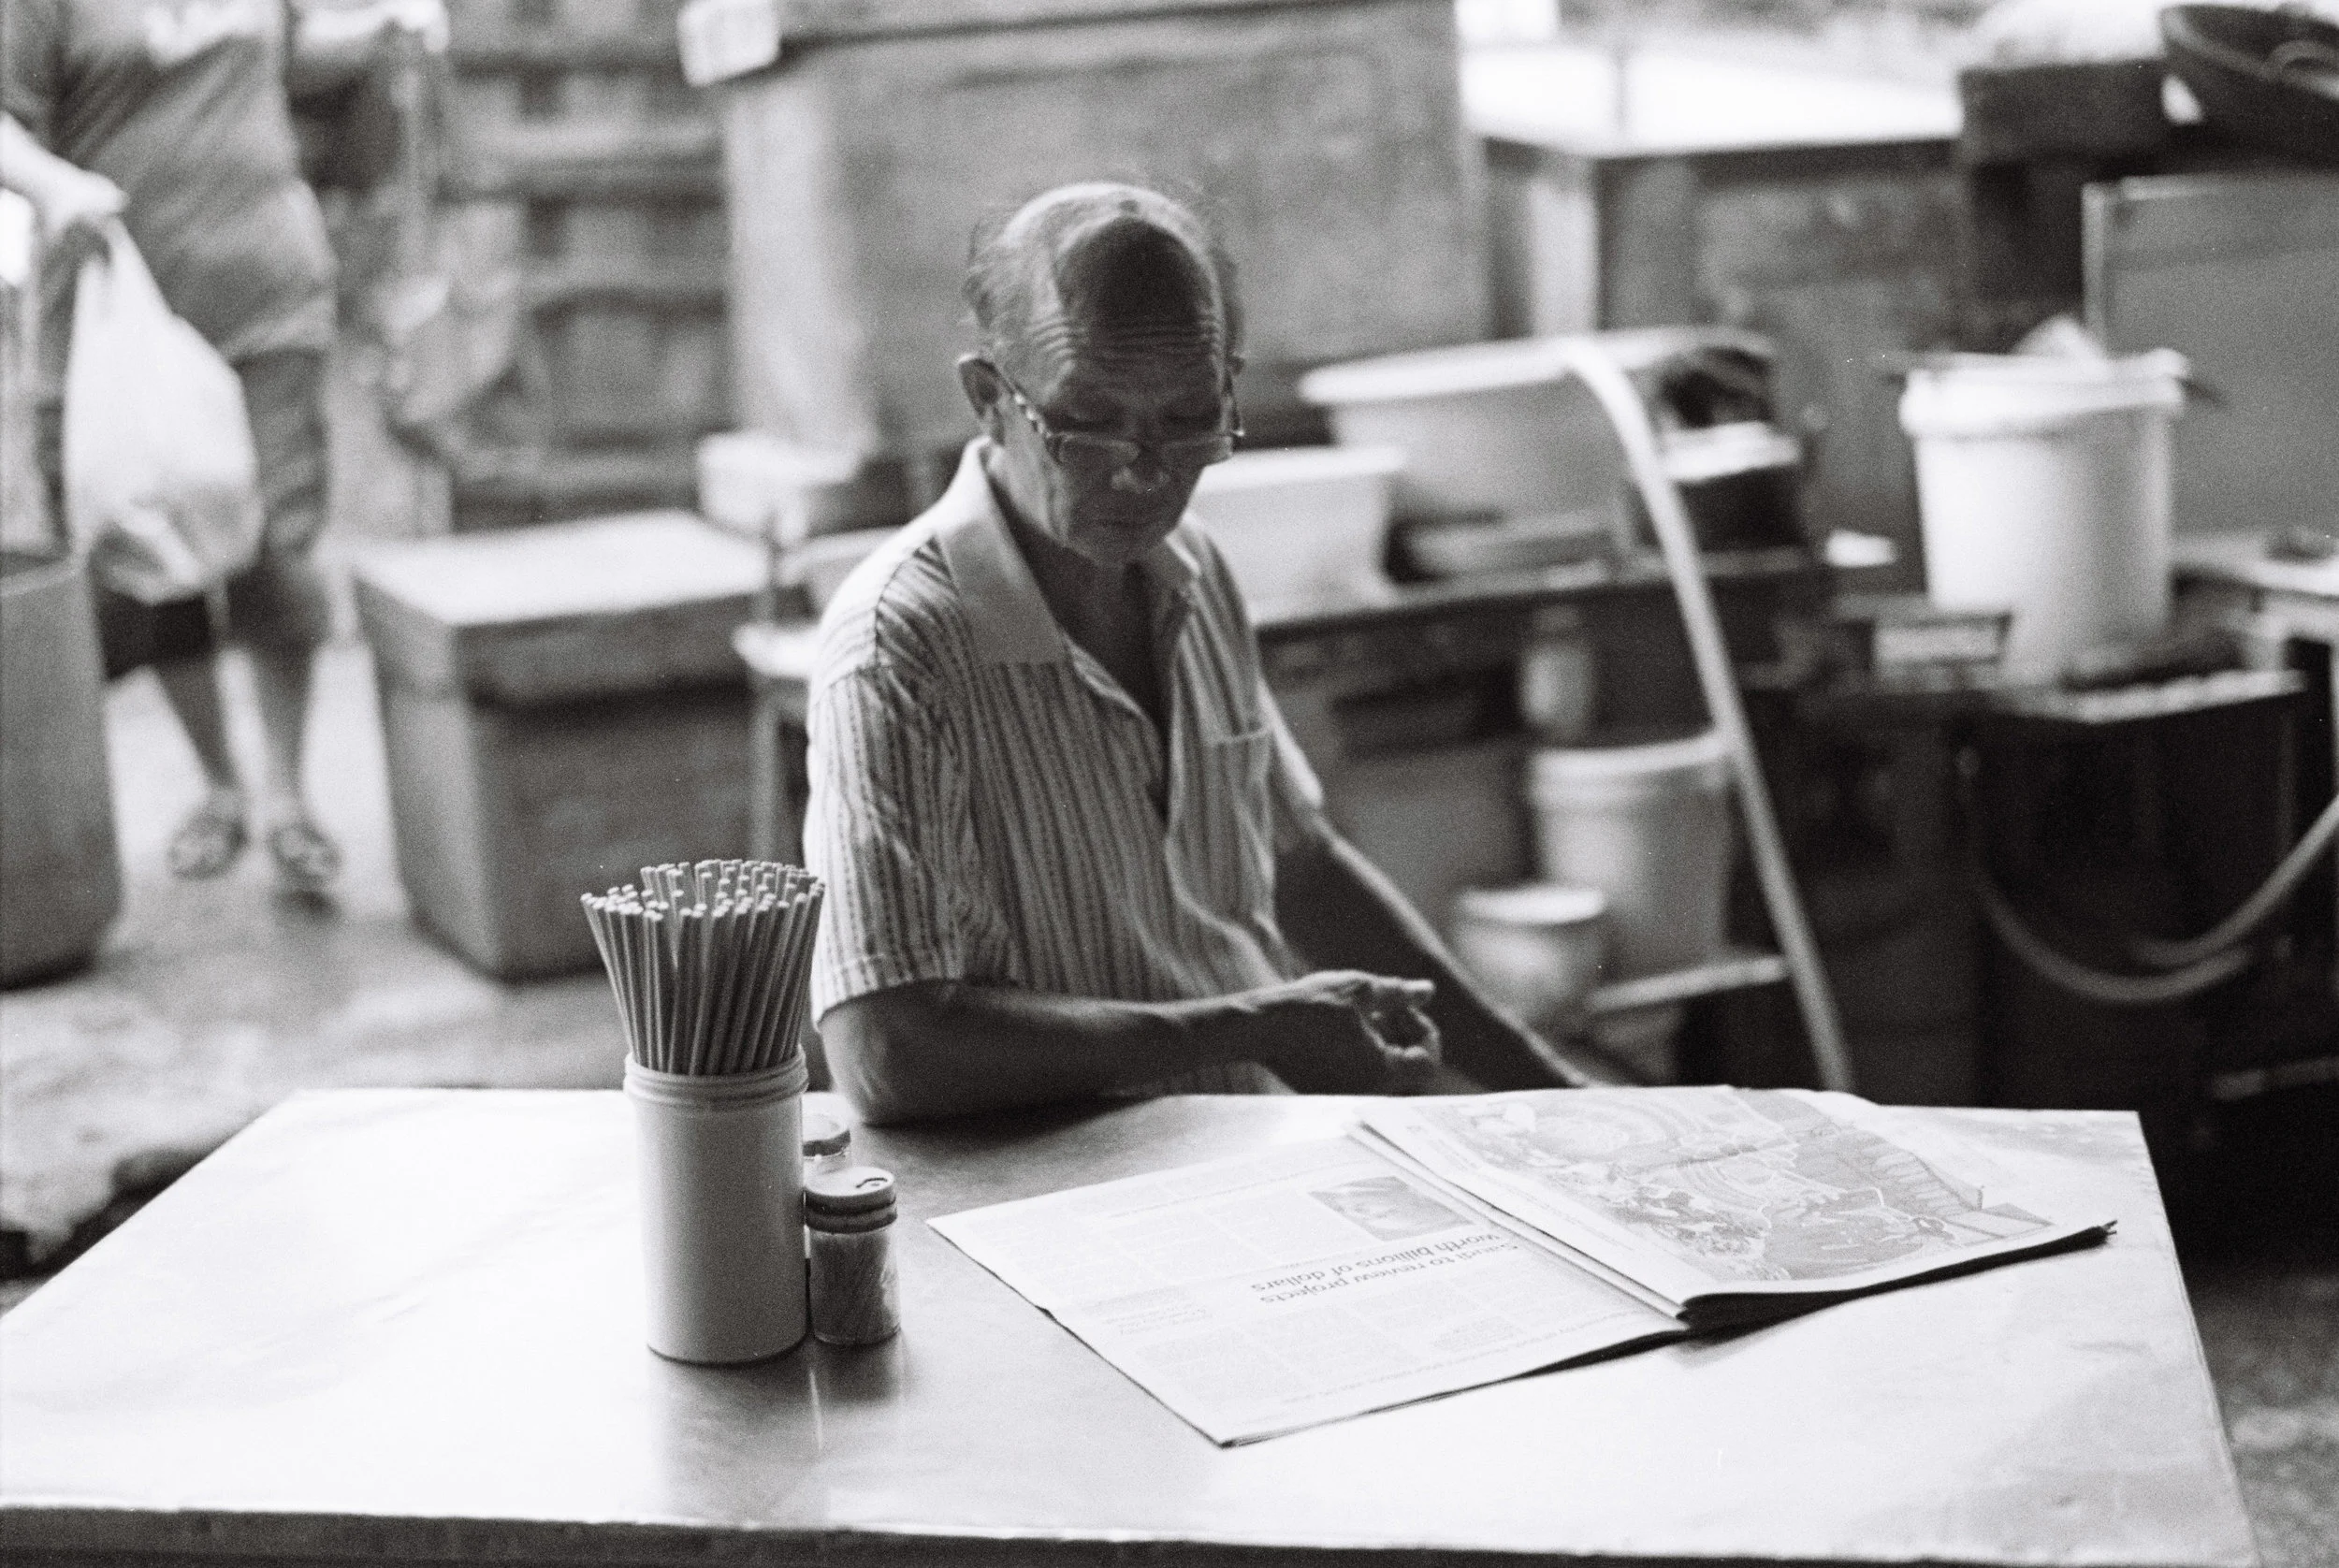
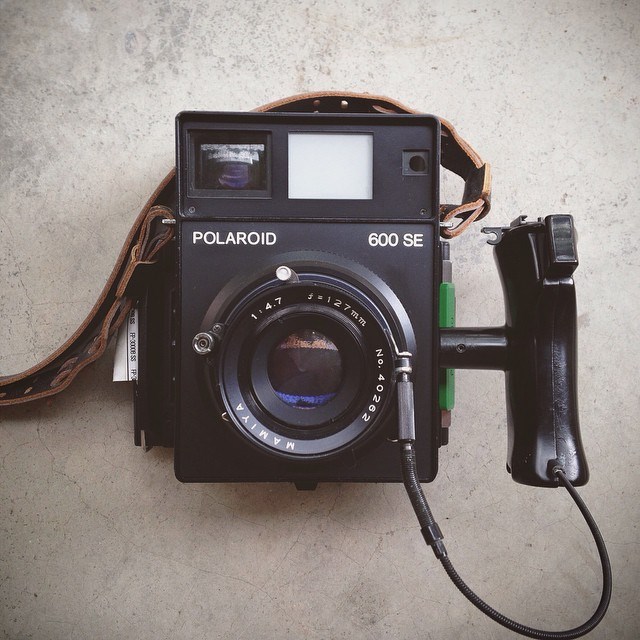
6) It’s FUN ! I love street and wedding photography and carrying a vintage film camera around is easy to strike a conversation with strangers. I always get approached by uncles and aunties who is intrigue by those cameras from their era. After a short chat, it’s easy to get a shot of them : ) From experience, the more retro the camera is the easier it is to strike a conversation. There was one time I was shooting with a big ass Polaroid 600se in a coffee shop, the owner approached out of curiosity and asked me if I could take a picture of him with his lovely grandson. I was smiling ear to ear that a stranger would want his picture taken without me asking. After the shot, I was rewarded with two glasses of ice coffee for free ..

7) Film is making a come back ! Despite we see many good films are being taken off the market but I am sure there will be some to stay. Ilford have not discontinued any of their films for the past couple of years and highly sought after film such as the all time favorite Fuji Pro400H, Portra and Kodak TriX are unlikely to be dead as there are demands for it. Hence don't worry !

8) Learn to work on your photos in the darkroom ...not with the lightroom : ) I would say it's a total new experience. It's a lot more fun and seeing your images appear on the prints slowly and gradually is extremely rewarding and satisfying.

9) It's cheaper to shoot film in long run. Many consider shooting film is a luxury due to the high cost in buying and developing these film. It's actually not. A decent digital camera with lens would set you back around RM5k or so. You would need a computer to work on the files as well as additional storage space such as HDD / Cloud / NAS for backing up your photos. You might ended up shooting a thousand shots in RAW format for an outing or trip which probably only 100 of it are keepers while the remaining 900 stored away and never be seen coz they are too crappy to show When all these adds up ...it's actually costing a lot more. On a trip, I only bring 10 rolls of films which is probably around 36 x 10 = 360 shots but I ended up liking all 300 shots which I have taken. If you do the development on your own, it would be even more cost effective. All negatives can be stored in an organized folder or even in a shoe box as long it's keep in a cool dry place.

10. Enjoy easy and simply work flow once again ! How many of you always often spend countless hours in front of your computer trying to edit your last back of vacation photos which you have shot probably thousands of it but only ended up with just 100 or so keepers ? You will find shooting film is so so simple, there is nothing much you need to do besides archiving your negatives in a near and easy to find manner.


Still not convinced ? Feel free to check out our FILM GALLERY here !

11 Comments

The Best Film Camera For Street Photography

Comment

The Best Film Camera For Street Photography

Analog photography refers to photography using film film with a fully analog camera. Whilst it seems that the ubiquity and the huge amount of digital cameras has squeezed film photography out of relevance however the slow process of film photography is still dear to many street photographers even till this day. Famous names such as Bruce Gilden, Joey Meyerowitz, Louis Mendes , Trent Parke and Jamel Shabazz are all film shooters till this very day. It's the mystique and organic feel of the film look that these street photographers prefer over digital cameras.

For street photography, many photographers including myself love the rangefinder cameras simply because it is fast and being unobstrusive. The ability to zone focus is a huge plus point and the no frills operation makes it a joy to use. If I were to only choose one cameras, my pick would he the legendary Leica M5 and here's why .


1. It's a RANGEFINDER camera

Rangefinder camera has always been the camera of choice for street and war photographers due to it's compact size, extremely easy operation, amazing optics, fast focusing and the ability to do zone focus. With practice, zone focusing can be even faster than any of the auto focus out there in the market. For those who would like to further understand what is aRANGEFINDER Camera, you may check out my past article HERE.


2. Amazing ACCURATE METERING

Not many film cameras come equipped with spot metering and M5 is just one of it.  The M5 metering is certainly one of the best I have used to far. More accurate than most center weighted metered cameras such as the M6, M7 and alike. It never fails to produce amazing results in all lighting situation. This old school CDS cell meter may seem quirky in operation as it positioned right in front of the shutter curtain and it swings down once the shutter is depressed but it worked flawlessly.

image from:https://asingulareye.wordpress.com/2016/05/13/leica-m5-fabulous-or-failure/

image from:https://asingulareye.wordpress.com/2016/05/13/leica-m5-fabulous-or-failure/


3. ERGONOMIC

I often say the M5 is a user camera even though it is not much of a looker ( for some ). The layout of the buttons are so strategically placed. The ISO button is positioned on the top plate which gives the photographer a good reminder which ISO they are working with and for easy adjustment. The huge shutter speed dial which over hangs a little on the edge of the top plate enable the photographer to adjust with just one finger with ease. Also due to the slightly larger and heavier body, it balanced off with heavy lenses such as the Summilux and Noctilux really well.


4. Amazing VIEWFINDER

Looking through the finder, you will see the shutter speed visible in the lower portion of the finder, and to the right of that a horizontal bar. I have not seen any full mechanical rangefinder camerathat has this function ! Hence the photographer can see the shutter speed setting without lifting the eye from the finder. This may seem like a norm in the modern digital cameras but not for a cameras which was designed back in the 19971.  For metering, the two meter needles intersect that bar, one is controlled by the ASA dial and one is controlled by the light intensity.  Adjust shutter speed or f/stop until the three bars intersect. It may sound rather complex but it's a lot easier in real life operation. Also not to mention that the viewfinder is totally flare proof. The M6

Leica M5

5. It has a BATTERY CHECK FUNCTION

You wouldn't want to caught off guard without battery on critical moments. The frame line selector lever when pushed to the right indicates the current battery level on the viewfinder. Like all of the Ms, the M5 can still operate even without battery.


6. Affordable PRICE

As compared to all the German made rangefinder cameras such as the Leica M as well as the Zeiss Ikon , the M5 price is often lower then most of the M series cameras. Being plague by the ugly duckling syndrome and it's non-conforming to the traditional Leica look, most cameras collectors avoid this camera like a plague hence making it still very affordable. A good used copy will set you back around USD 800 while the M6 would be around USD1300 and above. For the price I think it's an amazing value for a fully hand assembled cameras with such an amazing history.


Below are some images taken with the M5 on various lighting condition

Comment

10 Comments

The Best Polaroid Camera - Polaroid 600SE

polaroid 600se

Last year, I was lucky enough to get my hands on a unit of Polaroid 600SE aka GOOSE instant camera at a relatively low price on ebay. I've been dreaming to get this camera for a very long time . Thanks a lot to my Polaroid fanatic friend , Afoi for the poisoning lol.

The Polaroid 600SE is truly an awesome instant rangefinder camera ! It is the “flagship” professional cameras for  Polaroid, based on the Mamiya Press design which both the Mamiya and Polaroid have been discontinued for many years. The camera have inter-changeable lens mount and it utilizes Mamiya lenses that produce amazingly crisp images. Being a medium format, the details and bokeh (out of focus rendition)  is indeed awesome. The subject is pin sharp while the bokeh is buttery smooth. The standard lens which comes along with the camera is a fixed 127mm f4.7 lens with Seiko leaf shutter.  There are additional lens option such as the Mamiya 75mm f/5.6  being the wide angle and the Mamiya 150mm f/5.6 as portrait lens are sold separately. I can't comment on these as I haven't got the chance to try out other lenses just yet.


Tips on Using the Polaroid 600SE

Using this camera at first seems a little quirky for most people, it’s LEFT HANDED and not to mentioned it weighs a ton ( almost 1.7kg ) !  You could easily use this as a dumbbell substitute when you feel like working out. Operating this camera is fairly easy as this is a fully mechanical, just need to remember the sequence. For those those is used to shooting with film medium format camera it would be pretty much at home for them. Here are the steps in short:

1. Getting the film - This camera uses the Fp100c ( color film 100 iso ) and Fp3000b ( black and white 3000 iso ) instant film manufactured by Fujifilm. It's sad to say that Fuji in the recent month has just discontinued the black and white FP3000b film pack hence if you have the chance....do stock up ! It's one of my favorite instant film and the flexibility of 3000 iso is simply awesome. A packet is around RM65 now for a box of 10 exposures. I used to get it for as low as RM46/ box previously before the announcement of discontinuation.   If you could buy in bulk, you could certainly save some money but do bear in mind of the expire date.

2. Load the film into the film back - This is one tricky part which most people got it wrong. First, make it a habit to check and clean the rollers of the film back. The built up gooey like substance from the fp instant film will hinder the movement of the roller. Just use a damp cloth and to clean the side of the roller contact point when necessary. Just make sure the roller moves freely as the added friction might cause the film tab to break and the entire pack of film will be wasted.

To install, pull up on the latch to open the film holder door, the door does not open flat hence don't force it. Always hold the film pack by the edges, not in the center. Slide the pack in at an angle, then push it down into place. If done correctly the film pack will be flush with the sides of the holder. Check that the white tabs are not caught between the pack and the holder. It needs to hang out of the film case. Close door and latch the metal hook to the holder. The final outcome should be as below. You would need to pull out the first sheet of the film to start using. That would get you at frame no.1 as indicated.

3. Metering - As the camera doesn't have a built in light meter, one would have to use an external light meter instead. I would suggest that you get the awesome Voigtlander VC2 meter and attach it onto the hand grip hot shoe. This is interchangeable with most cameras like Leica M and Nikon SLRs. If you have other light meters, feel free to use it too. I wouldn't suggest to use sunny 16 rule for instant film as the exposure latitude is not as wide as normal film . Further more price per exposure is relatively high around Rm6 per shot hence you would really want to get it right the first time.

4. Remove dark slide - Remove the dark slide when you are ready to shoot. Pretty simple and no explanation needed. Make sure you keep the dark slide back on when it's done as finding a used / replacement would be a bit costly.

5. Cock the shutter - you need to cock the shutter at the lens before pulling the trigger with your left hand. Just pull the lever down towards the left side until it clicks.

6. Exposure , Focus , Shoot  - Set the shutter speed and aperture on the lens.  Focusing on the 600SE is pretty much like all other rangefinder camera.  You just need to focus the image by aligning two images together at the little square box in the middle. Once done, just pull the trigger at the hand grip.

7. Removing the exposed film - Unlike most of the Polaroid cam which we a familiar with since our childhood where the film will be ejected automatically from the bottom of the camera with a loud winding sound, this 600SE operates rather differently. It's a two step process. First you have to pull out the white color film tab manually to activate the developing chemicals as per dig.40.  Then the second film tab will eject from the film back. Just pull the entire sheet out ( dig.41 ) in one single motion. It could be a little tight for the first few sheets but once you reach exposure 4, it should be a lot easier. Just wait for around 40 sec and you may peel off the instant film starting from the edges as per dig.42.

Screen Shot 2014-10-08 at 1.58.08 AM.png

Features

  • Variable aperture and shutter settings: Enables better stop- action and depth-of-field
  • Bright-image coincidence type rangefinder: Ensures sharp focus and accurate framing
  • Sturdy hand grip with adjustable hand strap: Simplifies handling and operation
  • Comes with standard Mamiya 127mm f/4.7 lens ~ produces incredible crisp, full-range images
  • Other coated, color-corrected lenses available

Specification

  • Shutter: 1/500-B with X-synch for flash
  • Flash: Uses conventional flash with X-synch
  • Interchangeable backs for flexibility ( Polaroid or film back )
  • Die cast aluminum body
  • no built in TTL metering. I usually use my iPhone light meter application and it works great

( Spec sheet plugged from camerapedia )

Below are some of the images which I have taken while experimenting with this camera. I’m using the Fujifilm FP3000B film for this series and it’s great for indoor studio purpose due to the 3000 ISO. This film is very stable as compared to the IMPOSSIBLE PROJECT Polaroids which I will touch on later when I have time. I’m not a big fan of the the color version of the Fuji FP100C as the pictures always turn out more cold. Not sure why but some pack might turn out nicer than the other even it’s shot under the same exposure. I have tried two packs which the color is slightly more magenta and I love it lots but I’m still trying to figure out why the variation.

So what’s the verdict you might ask ? I think it’s an awesome camera to have specially for those who love instant film. Image quality is superb and being medium format, the out of focus rendition is really smooth and tonal graduation is awesome. However, it’s really huge and heavy. Lugging it around for street photography is a big no no. You will ended up pulling a crowd instead of being discreet. More suited for studio or portrait use. Hope you like sharing and stay tuned for more ! Thanks


PS : Feel free to download the user manual HERE

film photography malaysia polaroid600se

Caution  !!

The Polaroid film process uses a caustic jelly which is safely packed inside sealed containers within the film pack. If accidentally you should get some of this jelly on your skin, wipe it off immediately to avoid an alkali burn, wash the area with plenty of water as soon as possible. It is particularly important to keep the jelly away from eyes and mouth.


10 Comments

4 Comments

8 Tips to Get You Started with Film Photography

MKP_3676.jpg

Planning to take up film photography but not sure where to start ? Here are a few pointers to help you out :

1. Get yourself a camera. A film camera is relatively easy to find. Just ask your dad, uncle, grandma, old friends and relatives and high chances that they might have one for your for free. If luck is not on your side, there is always ebay or and some local online stores such as Film Photography Buy/Sell Community (Malaysia) on Facebook. Not sure which camera to start with , just check out my old blog post on "Which Film Camera to BUY for beginners ?"

2. Give the camera a good check up ! High chances that the film camera which was left lying for years are no longer in optimum operating condition. If it’s purchased off ebay, do check with the seller on the condition. Mint +,  Mint - and Excellent are general term seller use describe their camera condition, so don’t be deceived. A mediocre condition will be graded as good with that sort of grading system. Best to do more research about the camera before investing, even more so on cameras with automation as repair would be really costly or high possibility that there is no more parts available.

Some of the frequent problems which plague mechanical film cameras are deteriorating light seals and mirror bumper, sluggish or inaccurate shutter speed, fungus on lenses and camera viewfinder, inaccurate or dead light meter and corroded battery compartment due to battery leakage. While for Twin Lens Reflex ( TLR ) and Rangefinder cameras, the focus calibration is most crucial. To check, just focus on a very far object like a high rise building and make sure it alligned properly at infinity. If it's not most likely the camera needs to be calibrated.  Most of the above could easily be addressed with a simple CLA  (clean, lubricate and adjustment ) from any trained camera technician for about RM150 or so depending on the condition. If the above are all good, I will normally exercise the shutter around 30 over times on all shutter speed to loosen up the camera gearing and lubrication.

3. Experiments with different films ! There are a few varieties of films out there. Basically you just need to know the format size ( 35mm and 120mm which is the most commonly used ) , ISO and film type ( color negative, slides and black and white ). Always check your camera format before buying.

For starting out, Fuji Superia and Agfa Vista are pretty good for the price. You can easily get your films at my regular photo lab ColorDotCom Digital Photo Lab, Bang Bang Geng or any available online store like ebay and etc. It’s a good beginner film to play with without burning a hole in your pocket. More professional grade films color negative films such as the the Kodak Portra and my all time fav Fuji Pro400H and Kodak Extar cost around RM 20 over per box. For black and white, I use mainly Kodak TriX400 which is my all time favorite and I prefer to do the developing on my own for the extra added contrast. In my humble opinion, that's the most versatile film ever. You could push it 3 stops and still perform reasonably well.

4. LOAD the film into the camera. PLEASE be EXTRA CAREFUL when loading film into any SLR or rangefinder type camera which looks something like this image below. The MOST FRAGILE part of the camera is this shutter curtain. It's actually just a thin layer of metal or cloth like material which controls by the shutter speed dial. When you are loading the film into the camera, do ENSURE your fingers stay off this middle section and don't ever apply any pressure on it else the shutter shutter will bent or break. It happens to me once on my FM2 and it cost around RM300 for a shutter replacement, ouch !

Once the film are loaded into the camera, do ensure the film winder turns ( top left as per photo below as an example ) as you cock the shutter. If it's not turning, most likely the film is not loaded properly. You can always counter double check by turning the film winder to feel if there is any tension on the winder.

5. REMOVE that roll with the upmost care ! This is the most common screw up of all time :) You wouldn't want your hard work and masterpiece gone wasted, if you are not sure read the camera user manual before operating. Trial and error doesn't work all the time ! All film camera user manual can be downloaded from this website and of course a small donation to them would do great considering the effort being taken to digitize all those manuals.

http://www.butkus.org/chinon/

In general, just press the film release button once you are done shooting( film couldn't advance anymore ) and rewind the film as per the direction of the arrow. Keep turning until you feel no more tension on the winder, this may take around 20 to 30 turns in total.

6. Developing and scanning would be the last step. In my opinion, there are two reputable photo lab in Kuala Lumpur that does developing, one being Color Dot Com in Uptown Damansara in which I am currently using and also Bang Bang Geng in Publika. Both of them are pretty good and I am happy with the out come so far. All scanned images will be supplied in jpeg format burnt into a CD or can be transferred online. Hence it's pretty easy

7. Practice makes perfect . Don't be despair if your first few rolls doesn't turn out as nice as you wanted it to be. It takes countless rolls of film and time to master. I have burnt through many rolls of film to finally figure out the characteristic of each film.

8. Don't be overly ambitions. Stick with one film for a certainly period of time before switching. Each film has different characteristic and exposure latitude ( in digital term they call is dynamic range : ) Hence constant switching you get you more confused and it's hard for your to actually know the film well enough.

4 Comments

2 Comments

Buying your first classic film LEICA M ?

f.jpg

I can still remember the day I first got myself a Leica camera. It has that mystical feeling or aura which I simply can't put it in words. My hands were sweating and my heart were racing when I was opening the DHL box after longing to own my dream camera for such a long time. The process is indeed rather daunting specially not everyone has the luxury to test every single one of the Leica M ( both film and digital ) in the market and pick the one that suits you perfectly. I am based in a Kuala Lumpur Malaysia and access to vintage film camera is already hard due to the lack of demand and popularity here. Hence I am writing this article to help out those who is keen on getting their very firstfilm Leica M. Below are some points to consider :

1. Do you need built in light meters ?

2. Favorite focal length ?

3. Budget ?

4. Purpose intended for ? Use or collection ?


NON LIGHT METERED M

Leica M3 - Around USD 1000 to USD 1300

Let's start off with the great grandfather of all M's ....the Leica M3. This is the first M every created by Leica dated back in 1954. The M3 is extremely well made, with brass top and bottom and the amazingly huge 0.92x viewfinder is a class on it's own. It has the largest viewfinder and focus patch ever made on any Ms to date. The widest frame-lines is 50mm hence if you are using a 35 or a 28mm lens, you will need an additional viewfinder mounted onto the hot shoe. The cocking and winding mechanism is buttery smooth and it's joy to use.  This camera doesn't come with a built in meter ( as it wasn't even invented yet back then ) and doesn't require any battery to operate as it's fully mechanical. Hence you might need an additional light meter or sunny 16 metering method when one.

As the production life span of the M3 is around 12 years , there are minor updates being implemented along the way hence later / bigger serial number would be more sought after by collectors and users alike. Early production M3 starting from approximately around ( 700,000 ) would have a double stroke cocking mechanism, which means you need to turn the film lever twice to advance one frame. German has always been really safe and precise with their engineering and it's actually a safety factor to avoid film breakage. This function was later changed to single stroke as it reaches 850,000 production number. Go for serial number 950,000 and above and you will be sure to have all the latest and greatest upgrades such as even larger viewfinder, self timer, modern strap lugs and unbreakable metal pressure plate. A chrome M3 will set you back around USD 1.2k while the rare original black paint one is about the price of a kidney : )

Pros : Highest magnification M ever produced ( 0.92x ) hence perfect for 50mm shooter, amazing built quality , silky smooth mechanism , works great with summilux and noctilux , believe to be built without compromise and manufacturing cost in mind . Historic value as it is the first M ever made !

Cons : No light meter , need additional viewfinder to use wider than 50mm focal length , slower film loading mechanism ( but fool proof ) , needs to hunt around for a really good unit as it's the oldest M of the lot. Iconic camera hence most sought after.


Leica M2 - Around USD 650 - USD 900

The M2 was created a year or two after M3 was launched based on feedback gathered from photographers.  It's a more affordable version of the M3 as many photographers couldn't afford the M3 back then. Hence some functions and features were removed to keep the price down. The automatic film counter on the M3 was replaced with a cheaper manual reset version. Secondly early production M2 doesn't come with a self timer function but later it was added back during halfway of the production cycle. The viewfinder magnification was reduced from the whooping 0.92x to the more modern 0.72x to cater for 35mm focal length.  The outlook is still pretty much the same as the M3 except for the top penal which has an obvious rounded film counter. The build and feel is still as good as the regular M3. For the price it makes a good first M camera for most user due to it's attractive price point. One can always add a Leica MR4 or Voightlander VC2 pocket size light meter on the camera hot shoe which makes life a lot easier.

Pros : Wider 0.72x viewfinder makes it more suitable for 35mm focal length, same amazing built quality as the M3 with silky smooth operation, flare proof viewfinder and more affordable as it's often overshadowed by the more bling up M3. A real workhorse.

Cons : No light meter, slower film loading mechanism as M3, manual reset film counter, no self timer on some earlier units ( if you are into selfies )


Leica M4 - Around USD 1400 to USD 2000

There are a few variation of this cameras being produced, the original first production M4 and the later M4-P and M4-2. I would suggest to stay away from the later ones as they were never really sought after. The M4-P and M4-2 were made during the economic down turn of the company, production was moved from Germany to Canada and many of the parts were replaced with lower quality ones. The original M4 is still the best among the rest in my opinion, it still has the same construction as the M2 and M3 with a modern film winding mechanism , easier film loading method and the same 0.72x viewfinder magnification. Again the black version is more sought after by collectors due to it's rarity. Many regard the M4 as the last best classic film M ever produced.

Pros : Modern film loading, modern film winder, still made the same way as the M2 and M3 with top notch materials.

Cons : High price due to it's collectability and rarity as production life was not as long as it's older siblings.


METERED M

Leica M5 - Around USD 800 to 1300

The M5 is the most unique of all film Ms. It's the first M with a built in light meter and the operation was rather primitive but highly accurate. The cds light sensor moves into the front of the shutter curtain once the film is cocked and moves out of the way when the shutter fires. The size of the light sensor is rather small hence it operates like a spot meter. Due to the moving mechanism, some wider angle lenses such as 4/21mm and 3.4/21mm Super Angulons which has a deep protruding rear elements which extends almost to the front of the shutter shutter on the camera when mounted. The earlier version of the collapsible lenses should be avoided as well as these lenses might hit the light sensor moving arm and cause great damage.

Besides that, the M5 body shape and ergonomics was redesigned ground up. It borrowed many of it's design ques from the Single Lens Reflex ( SLR ) camera which was just introduced in the market during that time. The body was larger for better grip ( like an SLR ), the small shutter speed dial from the past was replaced with larger ones which overhangs on the sides with allow the index finger to maneuver it easily, strap lugs position been changed for more ergonomic , film winder been switched to the bottom plate for easier operation. Some calls it ugly but I think it's a beauty. Due the larger body size, it balance with the heavy 50 Noctilux or 50 Summilux really well but when mounted with smaller 35 mm lenses ...it does looks weird. The M5 wasn't loved by much and it was discontinued not long after making it one of the shortest production life M ever made.

Despite it's 'ugly ducking' moniker,  the M5 is one of my favorite so far. The metering is spot on accurate, fast and ergonomics maneuvering and it balance with my chrome 50 Summilux really well.

Pros : Ergonomics , love the spot meter , reasonable price, 1.35v mercury been discontinued hence replacement Wein Cell is not as easily available.

Cons : Big and bulkier than a regular M, collapsible and wider lenses might not be compatible, doesn't looks like a regular M which most people love.


Leica M6 - Around USD 1400 - USD 1800

Leica M6 started it's production life from 1984 to 2002 hence there have been quite a few variations and improvements being implemented along it's production life. The M6 has a few variations ...the Classic and the TTL version and all comes with 3 variations of viewfinder magnification 0.58x , 0.72x and 0.85x

Viewfinder comparison

source : http://lavidaleica.com/content/overview-m-system

source : http://lavidaleica.com/content/overview-m-system

The M6 Classic is the early production units for this model. The design ques was brought over from the older Leica M4 with an additional light meter and the self timer function was removed. None of the M5 elements or design features were carried over. The shutter speed dial, film release lever and etc is basically identical to the M4. The body material is no longer using brass as per the older Ms and some components has been switched from metal to engineered plastics to make it more affordable to the masses. The sought after Leica script engraving on the top panel has been removed as well and the viewfinder is more flare prone compared to the older Ms. When shooting against strong sun light at certain angles, the frame lines as well as the center focus patch will be blinded making focus impossible.

On the other hand, the M6 TTL which refers to FLASH TTL and not exposure TTL came out on the later life of the production cycle.  Both Classic and TTL has in camera through-lens metering hence it's rather misleading Leica newbies. The only difference is manual flash or TTL automated flash that's all. The TTL cost a fair bit more and it sucks battery like no tomorrow , well for my unit at least. The classic can last me 20 or so rolls of film per change while the TTL would probably do 5 to 7 rolls if I am lucky. The camera will constantly consume battery when it's cocked or the shutter speed dial wasn't set on OFF mode.

Having both the Classic and TTL version of the M6 in my collection, I would say go with the classic as it has way longer battery life and a few mm smaller as compared to the TTL siblings. Also it's cheaper too !

Pros : A workhorse, built in metering , abundance to choose from with different viewfinder magnification options, easiest to hunt for a good unit, built in light meter , uses 1.5v LR44 battery which are easily available.

Cons : Lower quality materials used as compared to the earlier Ms but still very dependable , flare prone view finder.

2 Comments